Pages (function(i,s,o,g,r,a,m){i['GoogleAnalyticsObject']=r;i[r]=i[r]||function(){ (i[r

Showing posts with label canning. Show all posts

Tuesday, August 13, 2013

Making Fresh Blueberry Jam

We picked fresh local blueberries. We made jam. We used this recipe and took some photos.


For every three pints of blueberries discard the stems and crush berries. This makes roughly 4 cups of crushed berries and you'll include 4 cups of sugar and a package suregel.

We did not filter out the parts of fruit, thus, making blueberry jam. 

Steps

1. Bring water-bath canner, half full with water, to simmer. 
2. Wash jars and bands in hot, soapy water. Rinse with warm water. Drain well before filling.

3. Pour boiling water over flat lids in saucepan turn off the heat. Let stand in hot water until ready to use. 
4. Prepare fruit as described above. Measure exact amount into sauce pan - using less sugar with result in set failure. (don't add the sugar yet, however! only the fruit)


3. Sir in a box of pectin (suregel) into the sauce pot. Stir in water. 
4. Bring mixture to a full rolling boil.

5. Stir in sugar quickly (THIS IS WHEN YOU ADD SUGAR FROM ABOVE)
6. Ladle into jars, wipe jar rim, place lids from warm water onto jar, and screw on a jar ring to each jar.


7. If jam is hot there is no need to place them in canner. You can process jars in water bath canner for about seven minutes to ensure the jam inside is hot enough to create a seal for your preserved jam.


8. Once processed use a jar lifter to lift jars out of canner.

9. Let jars stand on counter for 24 hours while they seal. 


Sunday, July 21, 2013

Easy Canning: Making Dill Pickles

Last weekend I helped a friend preserve his massive amount of cucumbers as dill pickles. He grew these cucumbers himself. After they are harvested, he preserves many of them with his mom's help (for now). I knew how to make dill pickles from our Mrs.Wages pickle mix, but never before had I considered how easy it would be to use ingredients all from my garden!

Forget all other pickling recipes - this is the best.

Ingredients

  • 7 wide-mouth quart jars
  • 7 wide-mouth lids & rings
  • fresh dill, cucumbers washed and scrubbed (sort into sizes for nice-looking jars)
  • 1 or more cloves of pealed garlic

Cucumbers
Garlic
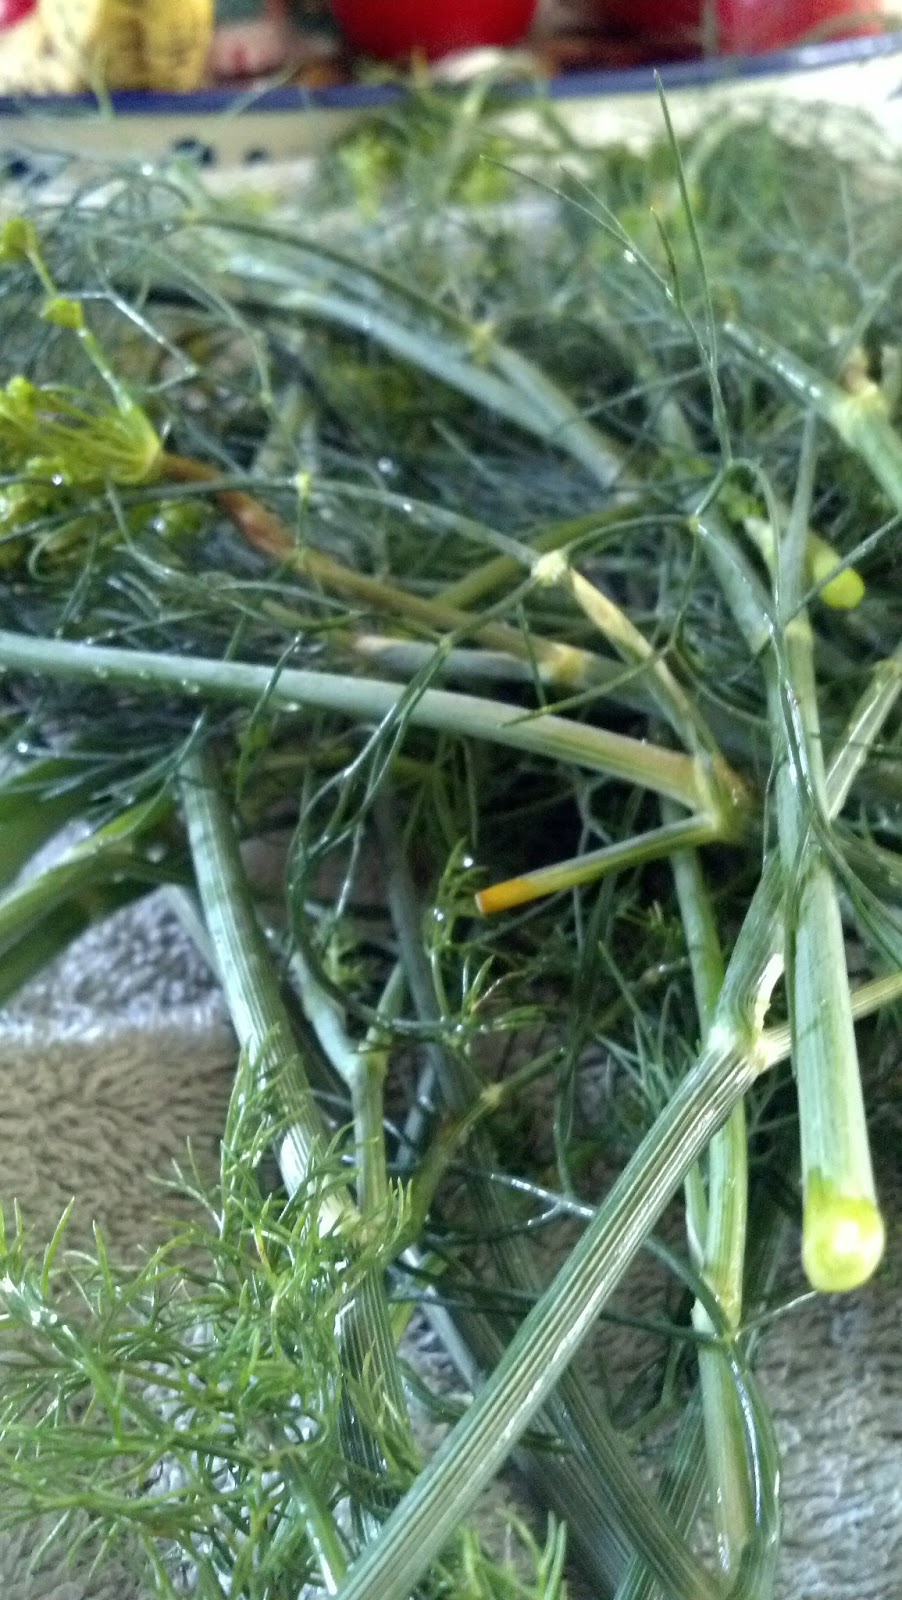
Dill 


Brine

  • 8 1/2 cups of water
  • 2 1/4 cups of white vinegar
  • 1/2 cup of pickling salt

Directions

GET ALL OF THIS GOING BEFORE FILLING THE JARS

  • Wash 7 jars in hot, soapy water then rinse and let dry
  • Fill water bath canner half-full with water; set on stove burner
  • In medium saucepan, fit lids and rings together, cover with water, bring to a simmer
  • In large saucepan, bring water, vinegar and salt to boil; turn off the heat; set aside

FILLING JARS: 

  • place a layer of dill and garlic at the bottom of each jar, 
  
  • tightly load cukes into the jar to the neck of the jar (depending on size you may have two layers of cukes)
      
  • add a top layer of dill and garlic clove if desired

  
  • Pour brine into filled jars leaving half-inch head space
   
  • Add lid and ring to each jar, tighten them evenly (wiping the glass jar lip with a clean cloth will help ensure the jars seal properly) 


Bring water almost to a boil (about 15 minutes depending on how fast it heats - too long and you'll not have crispy pickles) 
  • Remove jars, carefully set on a dish towel on the kitchen counter and wait for the seal - the indented lid (it sounds like a "pop")


Friday, June 21, 2013

How Often do you Need to Change Your Gasket

Sometimes knowing when to replace the gasket to your pressure cooker or canner can be a little confusing. We want you to be able to identify when you need a new gasket so that your pressure cooking and canning will be more efficient and safe.

The lifespan of your gasket is going to depend on how frequently you use your pressure cooker/canner, what types of food you cook in it, and how it is stored.

If there is steam escaping from between the body of the cooker/canner and the lid you will first want to make sure that the gasket, lid, and body rim are clean and properly installed, if you determine that they are then you can test your gasket.

To test the gasket, take it out of the lid, stretch it slightly and then retry sealing your cooker/canner. If the steam continues to escape then you need to replace your gasket with a new one.

It is a good idea to keep an extra gasket on hand so that if you are in the middle of a large canning session you won't be side tracked by having to go out and track down a new gasket. We carry pressure cooker parts for a large variety of pressure cookers and canners. For help finding the parts you need, contact our customer service at 1-800-251-8824.

How to Store your Pressure Cooker/Canner:

To extend the lifespan of your gasket you will need to properly store your pressure cooker/canner.

When you prepare your pressure cooker/canner for storage you will want to clean it well, make sure it is dry before placing it into storage. When you store your cooker/canner do not store it with the lid tightened on as this can cause a vacuum inside of the pot and the lid will not release when you try to open it. Many people will take the gasket out and store it inside of the cooker/canner pot and place the lid on upside down. Do not store your cooker/canner in a place where there is a lot of moisture or high temperature changes.

Keep your gasket clean, dry, and grease free. To install a new gasket, soapy water can make it easier to slip into the pressure cooker/canner lid.


Wednesday, June 12, 2013

Canning Season Will Soon Be Here

With canning season looming around the corner, it's time for many of us to dig out our pressure canners, dust them off and make sure they are working properly. If you haven't had yours tested lately, you should look up your local extension office and see if they offer free pressure canner gauge testing.

Check your canner's gasket to be sure that it is good to go, you don't want to be caught in the middle of a canning session with a bad gasket. It is a good idea to have one on hand just in case. We carry gaskets and other pressure canner parts if you find yourself in need of them for your canning projects.

If this is your first year canning you may need to assess what you will need and have it on hand before you get started. Here is a list of some basic tools that will help you during your canning endeavors.

Pressure Canner and/or waterbath canner (your pressure canner can double as a waterbath if you plan on doing both methods of canning)
Canning Jars
Jar Lids & Bands
Labels (so you know what is in each jar and when it was canned)
Bubble Remover & Headspace Tool
Jar Funnel
Jar Lifter
Lid Wand
Canning Salts, Pectin, Canning Mixes
Other basic kitchen tools from measuring cups to dishtowels, spoons to pots and pans.

Be sure to view all of our home canning supplies to get an idea of what tools are out there to help you.

Another thing to be thinking about right now is a preserve swap. Know someone who is able to can something that you have trouble with? See if they are willing to swap some of their jars with yours, you can make a big event of this with several of your local canners, but to do this you will want to start planning and inviting everyone now. This is a great way to get several people with canning knowledge in one place, utilize this and ask questions, there's no better place to learn canning than from the people in your own backyard.

Tuesday, April 9, 2013

Things to Know Before you Start Water Bath Canning

Canning your own foods can seem like a huge task to undertake, but once you get the hang of it you will be at ease with the steps to take. Plus the amazing taste of fresh canned foods is sure to win you over to this method of storing food.

If you are 100% new to canning and the techniques required, it is advised that you start with high acid foods that can be canned in a waterbath canner. Good high acid foods to can using the water bath method are:
fruits, fruit juices, jams, pickles, and tomatoes.

You will want to be sure you have all the canning supplies you need on hand and ready to go before you dive head first into a canning recipe.

To start you off, today we will go over water bath canning basics, some of the steps that you will take for waterbath canning are similar to the steps that you will take when you start pressure canning.

Be sure your canning jars are clean and have no nicks or chips. Dispose of any jars that are flawed or designate them for uses other than food storage (canning jar vases make any table look nice). To clean your jars you can either run them through the dishwasher or just wash up with soapy hot water.

You will also want your jars to be sterilized before putting food in them. To sterilize your jars fill your canner or a large pot about halfway with water, add more water if needed to cover the jars. Boil your jars for 10 minutes before filling them with food and allow them to stay in the hot water until you are ready to use them.

You will also want to heat up your jar lids for about 5 minutes in hot water. But keep in mind that you DO NOT boil the jar lids.

When you start your canning recipe you can start the water in your canner to preheating. When your food is ready, pack it into a sterilized jar being sure to follow the recipes instructions about headspace. Also remove any airpockets that have formed inside your jars. To remove them use a spatula, bubble freer, or plastic knife to run around the inside of the jar, if you more liquid is needed to correct the headspace after removing bubbles add it.

Wipe the rims of the jars to be sure any food is removed before placing on the lid. If food or debris is left on the rim  your jar lid will not seal correctly. Taking the band screw it on to fingertip tightness.

Place your jars into the canner being sure they remain upright. Once all the jars are loaded there should be 1-2 inches of water over the top of the jars. If more water is needed add boiling water to your canner.

Turn your stove's heat to high, place the canner lid on and wait for the water to come to a boil. Once the water is boiling you can set your timer for the processing time* that your recipe calls for.

Be sure to maintain a boil in your canner throughout the processing time. If your water stops boiling you will have to bring it back to a boil and start the timing over from the beginning. Add more boiling water to your canner if it is needed to keep the water level above the top of the jars at any time during the canning process.

After the time is up you will turn off the heat and remove the lid of the canner. After 5 minutes you can remove the jars. I recommend using a jar lifter to remove your jars from the hot water. Place your jars onto a towel in your workspace. Each jar needs a 1 inch space around in order to cool correctly. It will take 12 to 24 hours for the jars to cool. They need to cool at room temperature.

Checking the seal: After the 12-24 hours is up you can check the jar's seal by pushing down on the center of the lid. It should be slightly concave and making no noise. If you have jars that have not sealed you can put them in the fridge so long as they are eaten within a few weeks. Sealed jars are good to store in your pantry.

Always examine your jars and the contents before you eat them if there are any signs that the food is spoiled do not eat it. You risk catching botulism.


*If you live at an elevation of higher than 1000 feet then you will have to make what is called an altitude adjustment to your process time.


1001-3000 feet over sea level: Add 5 minutes.
3001-6000 feet over sea level: Add 10 minutes.
6001-8000 feet over sea level: Add 15 minutes.
8001-10,000 feet over sea level: Add 20 minutes.

Monday, August 27, 2012

Waterbath Canning Process - A How To

Waterbath Canning is a fairly simple process. The first thing to keep in mind is that you should only use the waterbath canning method for preserving high-acid foods. Following is a step-by-step guide in canning:

1. Washing Jars:  Wash your empty canning jars in hot soapy water. Rinse them thoroughly. Place your jars into your waterbath canner or place them into a separate large pot. Cover the canning jars with hot water; bring to a simmer over medium heat. For food that will be processed for less than 10 minutes, you will need to boil your jars for 10 minutes and keep them heated in simmering water until they are needed. Place your jars' screw bands to the side and put the lids into a separate saucepan (if you have a canning lid rack that will make this part much easier) cover the lids with water and bring them to a simmer (do not boil the lids as this will effect the seal).

2. Prepping the canner: If you are using a separate pot for sterilizing your jars (which I actually recommend) you will now want to fill your waterbath canner about half full with water; bring this to a boil. Heat any additional water in another large pot. This extra water may be needed to top off the water in the canning process; you will want to keep the additional water hot, but not boiling.

3. Food Prep: Now is the time to prepare your food. Be sure that you only prepare as much food as you will need in order to fill the number of jars that your canner is capable of holding at one time. Keep your work area clean during this preparation.

4. Remove your sterilized jars from the hot water (a jar lifter makes this A LOT easier and safer); place your hot jars onto towels in order to prevent them from easily slipping while you are packing them.

5. Pack the food into the jars, it is advised to use a wide-mouth funnel to prevent spills. Be sure to allow for adequate headspace. If extra liquid is needed, ladle your boiling liquid over over the food, again, allowing for adequate headspace.

6. Using a bubble freer or a non-metal spatula you will need to release trapped air bubbles from the jars. This is done by working your tool down the insides of the jar. Add extra liquid as needed in order to maintain the necessary headspace.

7. Wipe the jar rims clean with a clean damp cloth as food left on the rim can prevent a perfect seal, resulting in spoiled food. Place your prepared lids onto your jars (a magnetic wand helps a lot during this step), add the screw bands. Tighten the bands according to the manufacturer's directions.

8. As you fill each jar and have the lid and screw band properly placed on it you will want to place it into the rack in the canner. The jars should not touch each other. Replace the lid to the canner each time you add a jar.

9. When all the jars have been added, ladle hot water from the extra pot into the canner to cover jars with water by 1 inch.

10. Cover the canner; heat it to a full rolling boil and begin the processing time. Be sure that you follow the recipe procedures and timings EXACTLY. Allow for adjustments with the altitude if you live above 1,000 feet above sea level. Keep the water boiling during the processing, add additional boiling water if the water level drops. If the water stops boiling when you add more, you will need to stop timing, turn up the heat and wait for a full boil to return before you resume counting your canning time.

11. At the end of processing the jars, remove them from the canner. Place them on towels or on a rack in a draft-free area to allow them to cool. Leave a minimum of 1 inch of space between the jars to allow the air to circulate.

12. After your jars have completely cooled (this takes no less than 12 hours but up to 24 hours) press the center of each lid in order to check the seal. If the dip that is in the lid holds then your jar is sealed. If the lid bounces up and down it failed to seal*. If your jars lost any liquid but they have remained sealed,, then the contents are safe. Keep in mind that the food in those jars that are not covered by liquid will discolor so use these jars first once you start using your preserved foods.

13. Wipe your jars and the lids. Remove your screw bands and wash and dry them; then place them in storage for future use. Label your jars with their contents and the date that they were prepared. Include a batch number on the label if you process several loads in a single day, this helps if a jar has spoiled you will be able to identify other jars from the same batch. Store your jars in a cool dry, dark place and be sure to use them within a year.


*For unsealed jars you will need to check the jar for flaws (cracks, scratches, etc.) The contents of the unsealed jars can be refrigerated as long as it will be used within two to three days, frozen, or you can reprocess it so long as you do this within 24 hours. To reprocess, use a clean sterilized jar and a new lid. Process the food for the full length of time specified in the recipe. Use any reprocessed jars first when you start using your preserved food.

Source: http://canninginfowarehouse.com

Friday, August 17, 2012

Great Canning Information Resources

We've written off and on about canning and different things to can on here and on our Gardening Blog. Unfortunately we can't cover everything there is to know about canning, so we thought we'd scour the internet and find some links for you to visit now that it is the time to get out your canning equipment and start preserving.

We hope these resources come in helpful. If there are any with bad information on them or if a link is broken, etc. please let us know so that we can change it.


Home Canning Renaissance <- a bit of info on the upsurge in canning

Canning Info Warehouse

If there is a website we left out let us know and we will add it so long as it provides good info.


Tuesday, July 24, 2012

Informational Video on Presto Pressure Canner

We wanted to share a video with you about the Presto 23 quart pressure canner that you may find helpful in describing the various features that the presto canner is capable of.


The Presto Pressure Canners can be used as more than just a pressure canner, they also double as a waterbath canner (just do not seal the lid), or as a stock pot when you need a pot big enough for large soups or stocks.

Pressure canners are a wonderful way to help you put away your produce from your garden for future use.

Thursday, July 19, 2012

Pickling with a Pickling Crock

Pickling crocks can create more than just your typical cucumber pickles. Here are some other ideas of what you can pickle/ferment in pickling crocks:
  • Cucumbers
  • Sauerkraut
  • Asperagus
  • Beans
  • Bean Salad
  • Beets
  • Hot Peppers
  • Mushrooms
  • Relish
  • And More!
The process of pickling is the process of preserving foods through anaerobic fermentation in brine. Your brine is a solution of salt water. Then the food is stored in an acidic solution, typically vinegar, which results in its sour taste. Pickling foods is a food preservation method that has been around for over 4000 years, it has allowed us to make it through winters and spells of weather where fresh food was not readily available.


What is your favorite type of produce to pickle?

Thursday, July 5, 2012

Vintage Pressure Cookers

Last year we had a customer who sent us a photo of their vintage pressure cooker and we wrote the blog: A Vintage Pressure Cooker. This blog has been quite popular with our readers, we've had over 900 views of that blog since we posted it.

We are curious as to whether in the last year any of our other readers/customers have come across any vintage pressure cookers or pressure canners. Did you have an problems finding parts for pressure cooker? What year is it from? Would you be willing to share a photo with us? Let us know, we are very interested in what types of vintage cookers are floating around out there!


Thursday, June 28, 2012

Canning Terms for the Beginner

So whether you have already purchased a pressure canner or are still debating whether you want to take on this task, we have some canning terms to help you out in the beginning stages of the canning process.

Bacteria - a group of microorganisms that may produce harmful toxins in our food.

Blanch (Scald) - a process to loosen skins on fruits and vegetables and kill enzymes prior to preserving. Submerge food in boiling water for amount of time indicated in the recipe. Then remove and plunge into cold ice water to stop the cooking process.

Boiling Water Bath Canner - A special pot used for water bath canning. Should comes with a rack to hold canning jars off the bottom of the canner.

Botulism -a sometimes fatal disease of the nervous system acquired from spoiled foods in which botulin is present, especially improperly canned or marinated foods. Pressure canners are the only canning method that will reach the high heat needed to prevent it.

Cold packed (Raw Pack) - food is raw when it's packed in the jars. Hot liquid is added over the raw food. Just be sure not to actually put cold jars into your canner as the jars will crack.

Enzyme - enzymes start the process of decomposition, enzyme action slows in the freezer. Increases between 85 and 120 degrees and stops above 140 degrees. Blanching food before freezing stops these enzymes, making food last longer.

High Acid food- food which contains enough acid to have a pH of 4.6 These may be safely processed in a water bath canner.

Hot pack - food is first cooked or partially cooked in a syrup or other liquid before being placed into jars for canning.

Head Space - the space between the top of the food and the lid of the canning jar.

Jar - canning jar or mason jar. Designed especially to withstand home canning procedures.

Lid - canning lids come in a 2 part piece. Often when a lid is referred to it is specifically referring to the flat metal disc. Most are disposable, but there are some that are reusable such as the Tattler Lids and Rings.

Low Acid Food - food which contains minimal natural acid and has a pH above 4.6. All vegetables and meat fall into the low acid food category. Low acid foods must be pressure canned to prevent botulism. Exception: Tomatoes which can be acidified with lemon juice and can be water bath canned.

Process- Sterilizing jars and the foods packed in them through either a water bath canner or a pressure canner. This destroys molds, bacteria, enzymes and yeasts.

Pressure Canner - Pots made exclusively for pressure canning (some can be used for large batch pressure cooking as well). Should comes with a rack to hold jars off the bottom of the canner. There are two types of pressure canners- dial gauge and weighted gauge.

Pectin - a natural substance found in most fruits. This is what causes the jelling of fruits when making jellies or jams, most jams and jelly recipes need extra pectin. Pectin can be purchased in both powdered and liquid form.

Pickling - Preserving food in a solution of brine or vinegar.

Raw Pack (Cold Pack) - food is raw when it's packed in the jars. Hot liquid is added over the raw food. Just be sure not to actually put cold jars into your canner as the jars will crack.

Screw Band - part of a canning lid. This is a metal ring which is screwed down to hold the flat lid against the jar so that it will seal during the canning process.

Scald (Blanch) - a process to loosen skins on fruits and vegetables and kill enzymes prior to preserving. Submerge food in boiling water for amount of time indicated in the recipe. Then remove and plunge into cold ice water to stop the cooking process.

Simmer - to cook food gently, just below the boiling point.

Syrup- a sugar water combination used for canning fruits. sweetness levels range from very light to heavy. Heavier syrups use more sugar.

Venting - Forcing air to escape from a pressure canner.

Yeast - Microscopic fungi that causes fermentation.


Any pressure canning terms we left out? Leave us a comment and we will add it for you.

Friday, June 22, 2012

Pressure Cooker/Canner Parts, How to Find What you Need

On our website (http://pressurecooker-outlet.com) we carry parts for pressure cookers and canners. The brands we have parts for are Presto, Mirro Matic, Wearever, All American, Sears/Maid of Honor, Chef's Design, and Maitre's. We sell body and cover handles, gaskets (sealing rings), air vents (over pressure plugs), vent tubes, regulator weights (pressure indicators), cooking and canning racks, interlock assemblies, recipe and instruction booklets, steam gauges, interlock assembly gaskets, steam gauge adapters, Bakelite knobs, All American bolts and pins, lid handles, steamer baskets, colander covers, glass covers, cookbooks, and lift pin assemblies.

We carry parts for 245 different Presto models, 93 different Mirro Matic models, 75 different Sears/Maid of Honor models, the 910, 915, 921, 925, 930, 941, and #7 All American models, 4.2, 6, 8, 12, and 22 quart models for Maitres, 4.8, 6.4, 9, and 10.9 quart models of Chef's Design. Prices on the parts vary by brand.  The models we carry parts for date back as far as 30 to 50 years. The parts are usually fairly simple to replace, but if you have trouble, you can call our customer service department for tips and pointers.

To know which part you need for your particular pressure cooker or canner you need to get the model number off of it, or if it is unreadable you need to have the specific part number for the part that you need. 

To find your model number on the Presto brand you will need to look in three places, one: the tag on the top of the lid, two: the bottom of the pot, or three: on the side of the pot underneath the handle. There will be the number 409A on the bottom of the Presto brand but this is NOT the model number, it is a listed number and it is on almost all of the Presto brand pressure cookers and canners.

To find the model number on the Mirro Matic brand you will just need to look on the bottom of the pot, and for some parts you need to know the month and year that it was manufactured, this will be a one or a two digit number on top of a two digit number, this is also found on the bottom of the pot and it is usually to the right of the model number.  On the Mirro Matic brand there is also 284H on the bottom of the pot, this is NOT the model number, it is on most all of the Mirro pressure cookers and canners and it is a listed number just like on the Presto.

The model number for the Sears/Maid of Honor is usually on the bottom, but it can also be on the side of the pot underneath the handle.

For the All American the model number will either be on the bottom of the pot or on a tag on the lid.

To find the model number on the Wearever and the Kitchen Pro you will need to look on the bottom of the pot. For the Chef's Design and Maitres you will not need to find the model number you just need to know what quart size it is, this is usually stamped on the bottom of the pot, if you cant find it or it has rubbed off all you need to do is get a quart jar and fill it with water and see how many times it takes to fill your pot all the way to the top rim. 

If you cannot find the model number of your pressure cooker/canner or the part number, just call our customer service department and they will do the best they can to help you determine which parts will be right for your item. We will be glad to help you in anyway we can to find your pressure cooker parts.


Monday, June 18, 2012

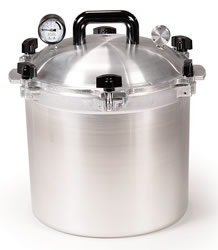
All American Canner Information


I like to think that the All American pressure canner is the Cadillac of pressure canning.  This brand of canners is very dependable and you do not have to buy replacement parts for them unless you break something or lose it.  Always read the instructions before using this brand of canner (or any brand) and always keep the instructions because you never know when you may need them.

There are many different sizes but they all use the same parts except for the canning racks. 

General information on the All American Canners:
These canners have a metal to metal seal, which is great because you do not have to worry about a gasket.  The mistake that a lot of people make about the metal to metal seal is they completely screw down one of the wing nuts.  This makes it a lot harder to get the lid on correctly and causes the steam to leak out while canning.  You start with one and just screw it down enough to get the wing nut to stay in place.  Then you move to the one on the opposite side of the lid and do the same thing.  You keep doing this until you have gone all away around your canner.  Then you start tightening the wingnuts down.  Keep in mind that you keep going to the opposing wing nut that you are working on next; you do this until you are finished.  Once you have mastered the lid all of the other components are the same as any other canner; you have your pressure regulator which you can set at the pounds of pressure that you are working with.  It also features an over pressure plug and a pressure gauge that tells you what pressure you are canning at.

The All American 910 Canner is the 10 Quart size and will only hold 7 pints jars and 4 quarts.  A little inside information on this size canner, you cannot can fish with this size or with the 915.

The 915 canner will only hold 10 pints and 7 quarts and again you cannot can fish in this size canner you need the next size up.

The 921 and 925 hold 19 pints and 7 quarts.  The only difference in these canners is that they hold a different liquid volume.  Some people like to use these sizes for actually pressure cooking, large sides of beef and vegetables that lose their size when they are cooked down, such as leafy greens.

The 930 holds 19 pints and 14 quarts.

Last is the biggie, the 941, is the monster size.  It holds 32 pints and 19 quarts.  The reason I have not listed the half-pint sizes and the half-gallon size is because the 941 canners have not been tested for these sizes.  Only pints and quarts and those are the standard mason jars. 


Thursday, May 31, 2012

What do You Need for Pickling?

Pickling is a great way to preserve foods. Most people associate pickling with cucumbers, but as many are starting to see it can be used for nearly any type of produce. Just to give you an idea of foods that you can pickle, here are a few that have recipes in The Complete Book of Pickling:
  • Artichokes
  • Asparagus
  • Green Beans
  • Beets
  • Radishes
  • Cantaloupe
  • Cherries
  • Figs
  • Grapes
  • Crabapples
  • Strawberries
  • Plums
  • and much more...
And of course the book has the more traditional pickle recipes as well. So that brings us to... What do you need for pickling? What tools will you need to get started? Well, I personally recommend having a book with instructions, many canning books have some pickling recipes in them, including the Ball Blue Book of Canning. And, of course, some of the tools you need may vary depending on the food that you are pickling.

But here are the basics:
  • A Large Pot
  • A Canner
  • Pint Pickling Jars
  • Spoons & Ladles
  • Jar Lifter
  • Canning Lids (be sure they are the correct size for your jars)
  • Canning Rings (be sure they are the correct size for your jars)
  • Canning Funnel
  • Lid Wand or Lid Lifter to pick the lids up out of the boiling water after sanitizing them.
And of course you will need your ingredients (which will vary depending on the recipe that you use) and typical kitchen items such as kitchen towels, etc.


We would love to hear about your pickling adventures, what have you tried and liked or didn't like? Please share in the comments.

Thursday, April 26, 2012

Things You Need for Canning

While canning season is not quite here yet, it is sometimes advisable to take stock of your canning tools and supplies to see if something needs to be replaced. If so you may want to invest in it early so that you won't have to worry about stores running out of what you need once the canning rush begins in the fall. Here are a few of the tools that we recommend to have on hand when canning:
  1. A Pressure Canner or a Waterbath Canner (depending upon what type of canning you are going to be doing.)
  2. Canning Funnel: This is great for pouring your food into the jars without as much of a mess or spills as trying to do it funnel-less. 
  3. Jar Lifter: This handy tool helps you to lift jars out of the canner when they are done. It helps to keep you from getting burned on hot jars.
  4. New Canning Lids, while you can reuse canning jars (provided they have no cracks or imperfections) you will need new canning lids every time you can, unless you are using resealable lids such as Tattler lids.
  5. Canning Jars: look over your jars each year and be sure that they are not getting worn out, check for signs of cracks or chips in the glass. Also carefully inspect the mouth of the jar to be sure there are no nicks or imperfections where the canning lid will set as this could cause an improper seal, resulting in spoiled food. Any jars that have flaws should be discarded (or just not used for food preservation) and replaced with new jars.
  6. Most of the other canning supplies you will need tend to be kitchen staples, things such as dish towels, measuring cups and spoons, ladles, spatulas, stock pots, etc.

Thursday, April 19, 2012

Books to Can By

There are many foods that are able to be canned, whether by water bath method or pressure canning. We have several books that can help you in your canning endeavors, here are those canning books with a little info as to what can be found in each one:


In the pages of the Ball Blue book you will find great info for a beginner canner, including methods on how to preserve foods other than canning, such as dehydrating. Several of the instructions have great visual aids, particularly the green beans on pg. 70. A wonderful little guide to preserving that will be a great addition to any canner's collection.


The Ball Complete Book of Home Preserving has over 400 different preserving recipes. Most of which are canning recipes (waterbath and/or pressure).  This book even includes a produce purchase guide to help ensure that you are purchasing the freshest food possible for your preserving. Recipes included are for a variety of skill levels from beginner to pro. This book is a great addition to those wanting more recipes for their preserving endeavors.


The Complete Book of Small-Batch Preserving contains over 300 different preserving recipes as well as a chapter on preserving by freezing. The recipes are smaller batches too so that if you aren't wanting to can a lot, you can preserve just the amount of food that you will need.

Tuesday, January 10, 2012

All American Pressure Canner Instructions

We received a question from a customer regarding her All American Canner:


I have an All American Pressure Canner/cooker Model No. 920, but I don't have the instruction booklet. How could I obtain one? 
Thank you,
Marilyn T.
We answered Marilyn's question, but just in case you also have the same problem, we would like to help you as well.
With All American the instructions are made differently. One instruction booklet goes with all models. Here are a few different links to help you with your search:
So if you need an All American Instruction Manual, just visit any of the links above to find it. It will be called All American Pressure Canner 74 Instruction/Recipe Book  and should be about halfway down the page of All American Parts.

Thursday, October 27, 2011

Why can't you use a All American on a glass top stove?

A question that we get a lot from our awesome customers is about the All American Cooker/Canner. Why can't this canner be used on glass top stove?

Well, The All American Canners are a heavy duty and extremely durable canner. That means that they weigh quite a bit and they also have a diameter that can be larger than the burner on the stove. This weight can cause them to break glass/ceramic on stoves combined with the fact that the larger diameter can cause the heat from the burner to spread across the stove means that even if the glass or ceramic does not break it can still be damaged on the surface rendering the stove unusable.

So it is better to play it safe and not use an All American Canner on a glass top stove.


Wednesday, August 17, 2011

Free Canning Jar Labels

To access the Free Canning Jar labels from Red Hill General Store go to: https://docs.google.com/viewer?a=v&pid=explorer&chrome=true&srcid=0B9Z9DSCfzOYtZWFkYzg5OWEtOWRhMy00MTM2LWE2YzctMjQwMTUwNmI2NDU0&hl=en_US

These were  made to fit the Avery 5963 labels, however, we are unsure as to whether being uploaded to google docs will alter the size of the labels.

Let us know if it works for you!

Sample pic:


Wednesday, July 6, 2011

A Vintage Pressure Canner

We received a photo from one of our customers:


She wanted to know if we sold parts for this canner.

It is a Ward's 16qt Cast Aluminum Pressure Cooker. It has the gasket free tapered metal to metal gasketless seal! I thought it was an All American but is say Ward on the lid. It has 7 wing nuts to secure lid. 2 of the wings of the nuts have one broken wing. Do you sell replacement parts for this unit?
 We decided to email All American to see what they said, since this cooker looks just like an All American Cooker and  because we were curious as to whether there is a back story to this model.

Their reply:
While this may be one of our pressure cookers, we do not recommend that it be used - keep it as a relic! The aluminum may have deteriorated over the years and developed cracks. The number 39 probably represents the year it was made - 1939. While we made pressure cookers for Ward's, no one here remembers there every being seven wing nuts on them. We believe there would have been six, as the present 15.5 quart (# 915) Pressure Cookers.

Attached is a letter regarding older ALL-AMERICAN Pressure Cookers, which may provide some information regarding this old pressure cooker, however, the issue of seven wing nuts and being made for Wards is not addressed.

So if you have an older canner that you are unsure of using, just get in touch with us at 1-800-251-8824 or email our customer service department at cs@redhillgeneralstore.com and we will do what we can to help you get the parts and/or information you need.
Related Posts Plugin for WordPress, Blogger...